Names and basemaps go together. The names add important orientation information to the basemap.
Sometimes, the names produced by the basemap server, such as Google Maps, are adequate. Other times, you need to place your own text on the basemap to identify key features.
Names come from a file, just like points and labels. The file has columns that provide the text for the name, the location coordinates and (generally) format information that controls the appearance of the text. As you’ve seen with points and labels, there is a set of param values that are used as defaults if you don’t otherwise specify values in the names table.
Getting Started
As usual, there are some tasks that need to be done. First, we’ll load some libraries and get the Google Map key registered.
Show the code chunk
## Librarieslibrary(readr) ## Read in datalibrary(stringr) ## Wrap text stringslibrary(ggmap) ## Show maps, handle Google keylibrary(ggplot2) ## Build mapslibrary(dplyr) ## Data wranglinglibrary(gt) ## Tableslibrary(sitemaps) ## Functions to help build site mapslibrary(parzer) ## Convert HMS to digital coordinates## Initialize Google Map key; the key is stored in a Project directory. My_Key <-read_file("P://Hot/Workflow/Workflow/keys/Google_Maps_API_Key.txt")## Test if Google Key is registeredif (!has_google_key()){## Register the Google Maps API Key.register_google(key = My_Key, account_type ="standard") } ## end Google Key test
Now we can initialize some data.
Show the code chunk
## Use two functions from sitemaps to initialize parameters.column <-site_styles()hide <-site_google_hides()## Establish a theme that improves the appearance of a map.## This theme removes the axis labels and ## puts a border around the map. No legend.simple_black_box <-theme_void() +theme(panel.border =element_rect(color ="black", fill=NA, size=2),legend.position ="none")
And we’re ready to go.
Names Styles
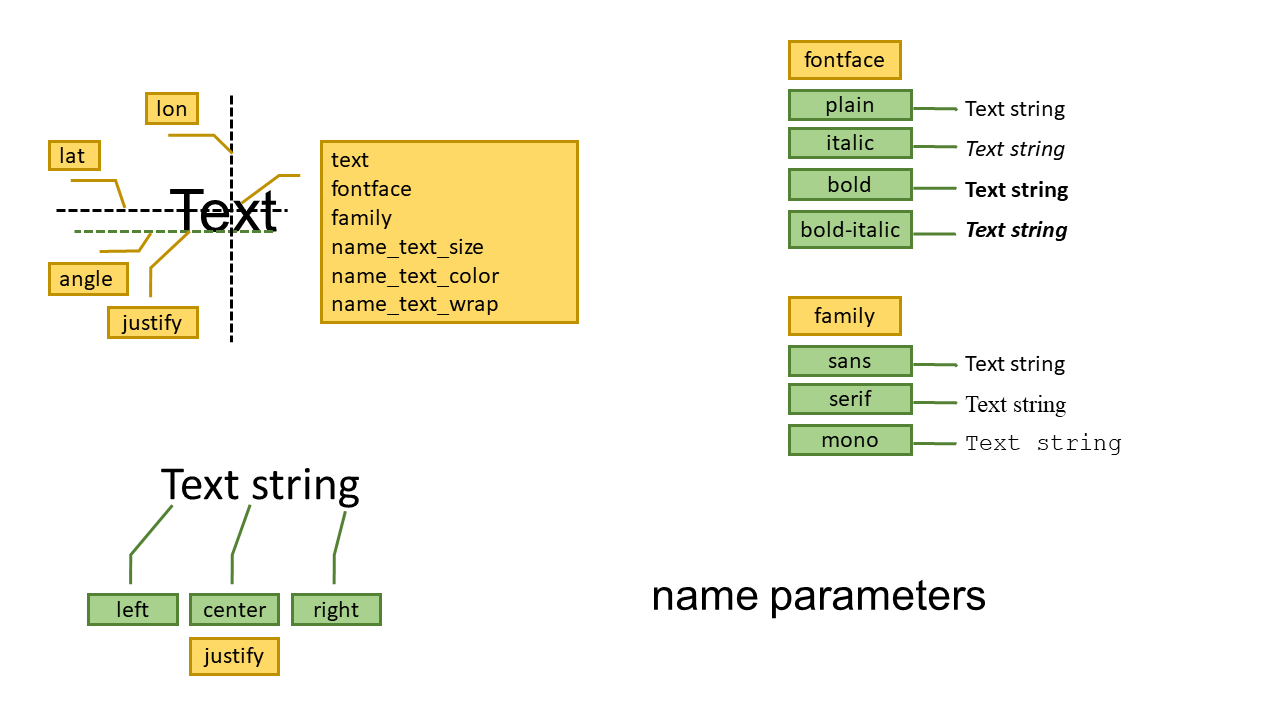
Names require a text, lon, and lat column in the data table.
Just like the points and labels, there are a number of parameters that control the appearance of names. A list of these is given in Table 1.
Table 1: Name styles and default values.
Specification
Default Value
Notes
name_text_size
4
Height of the text
name_text_color
black
Color of the words
fontface
plain
The fontface (plain, italic, bold, bold.italic)
family
sans
The font family (sans, serif, mono)
angle
0
Angle for the text (degrees; 0 = horizontal)
justify
center
The connection point and direction for the text link to the coordinates.
name_text_wrap
NA
Maximum number of text characters on a line. (NA=do not wrap)
Names Style Cheatsheet
Names Table
It’s good to start with an example. Let’s begin with a simple basemap.
Usually, we will use the distribution of data (points and labels) to determine the extent of the basemap. Since this map won’t have any data, we’ll use a standard way to locate and scale Google Maps: specify the center coordinates and choose an appropriate zoom value.
You may need to try a few different values to get this right. But remember, you usually won’t be making a basemap this way.
Here, the center value was obtained by looking at a Google Maps display on a desktop computer. Right clicking on the desired center location gave the needed coordinate values. These were copied and pasted into the code shown here.
You might also note that the style parameter is used with ggmap’s get_googlemap function. The hide$all parameter removes the information layers that Google places on the map. This gives us a “clean” map on which we can place our own names.
Show the code chunk
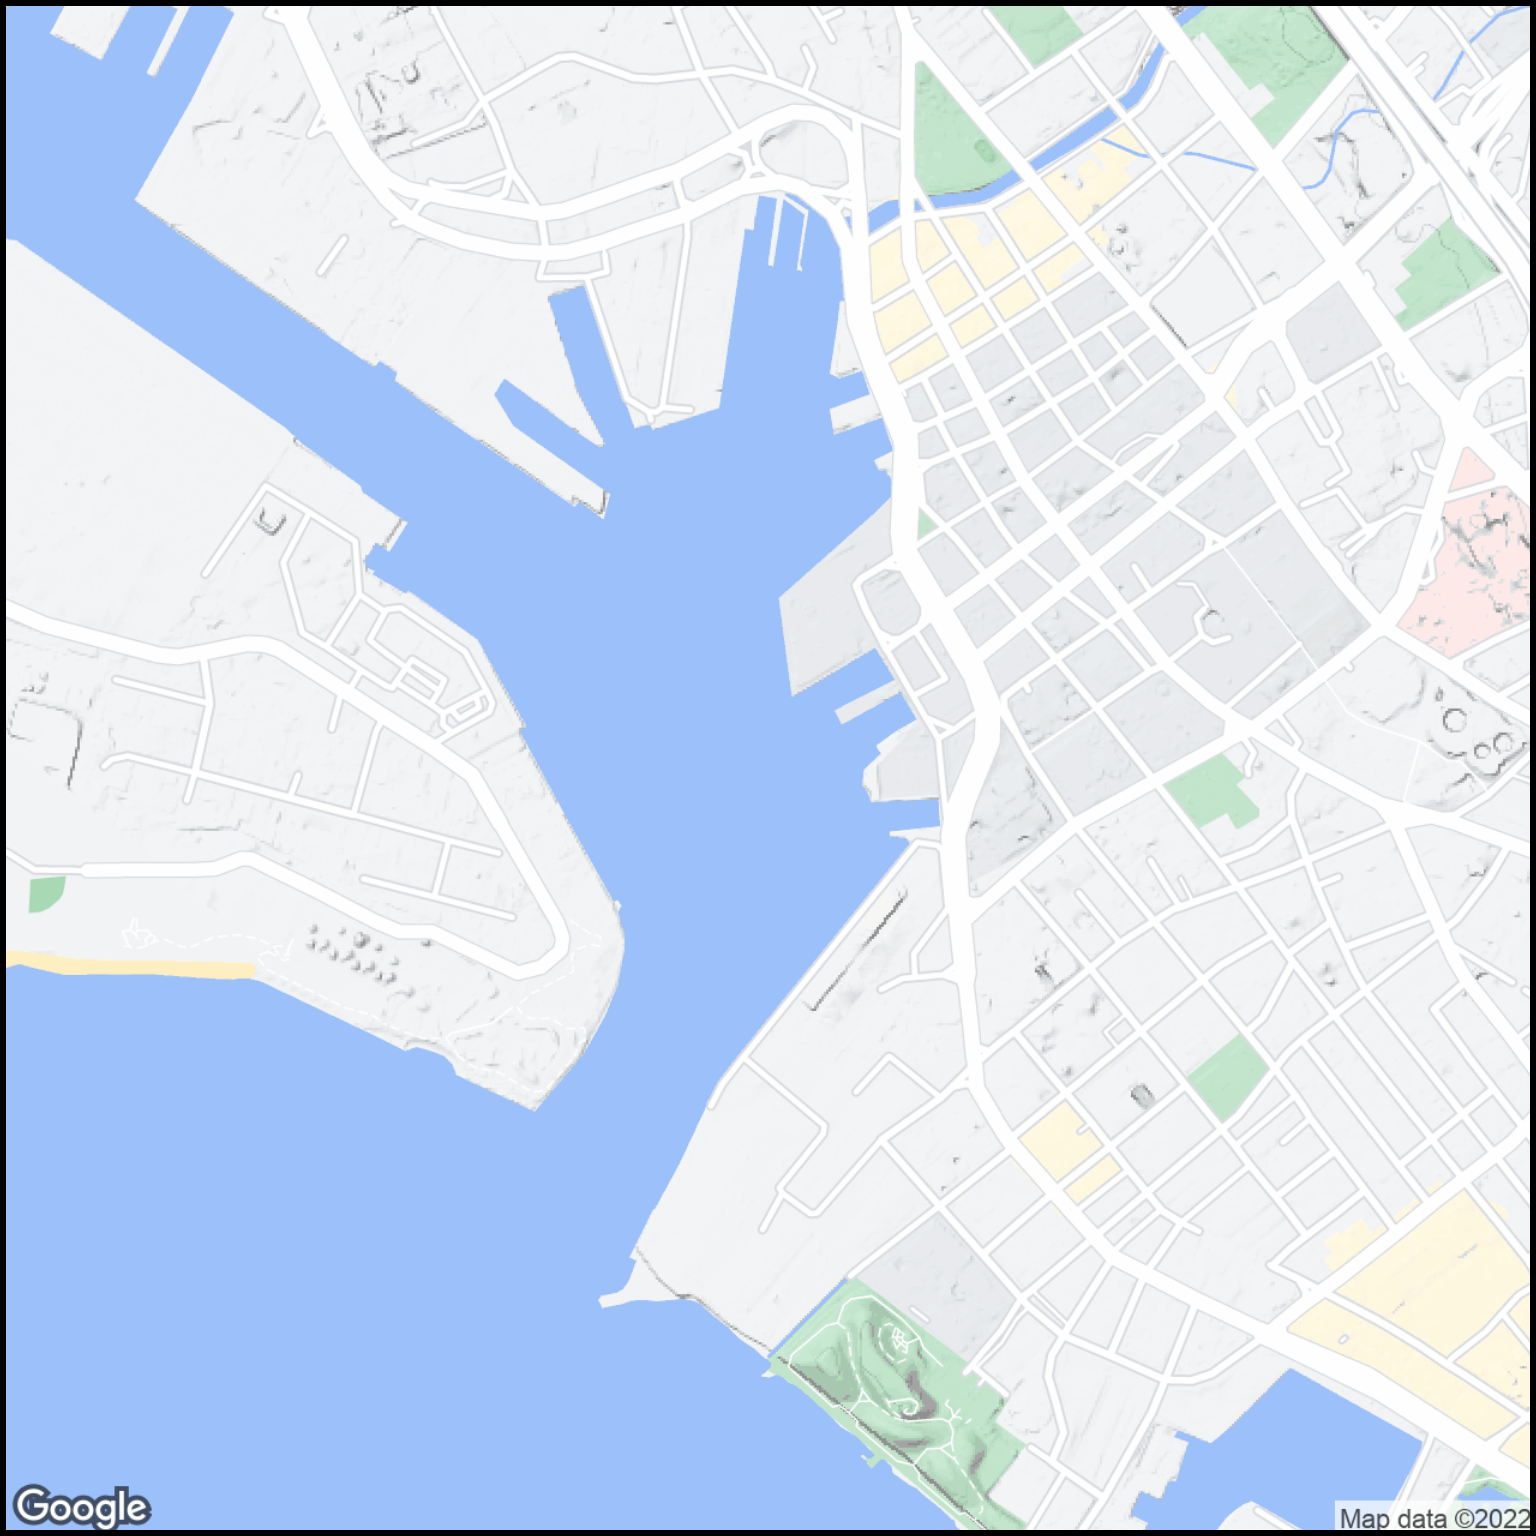
center <-c(lon =-157.86672, lat =21.30440)zoom <-15harbor <-get_googlemap(center = center,zoom = zoom,style = hide$all)ggmap(harbor) + simple_black_box
Figure 1: Google Maps basemap of Honolulu Harbor.
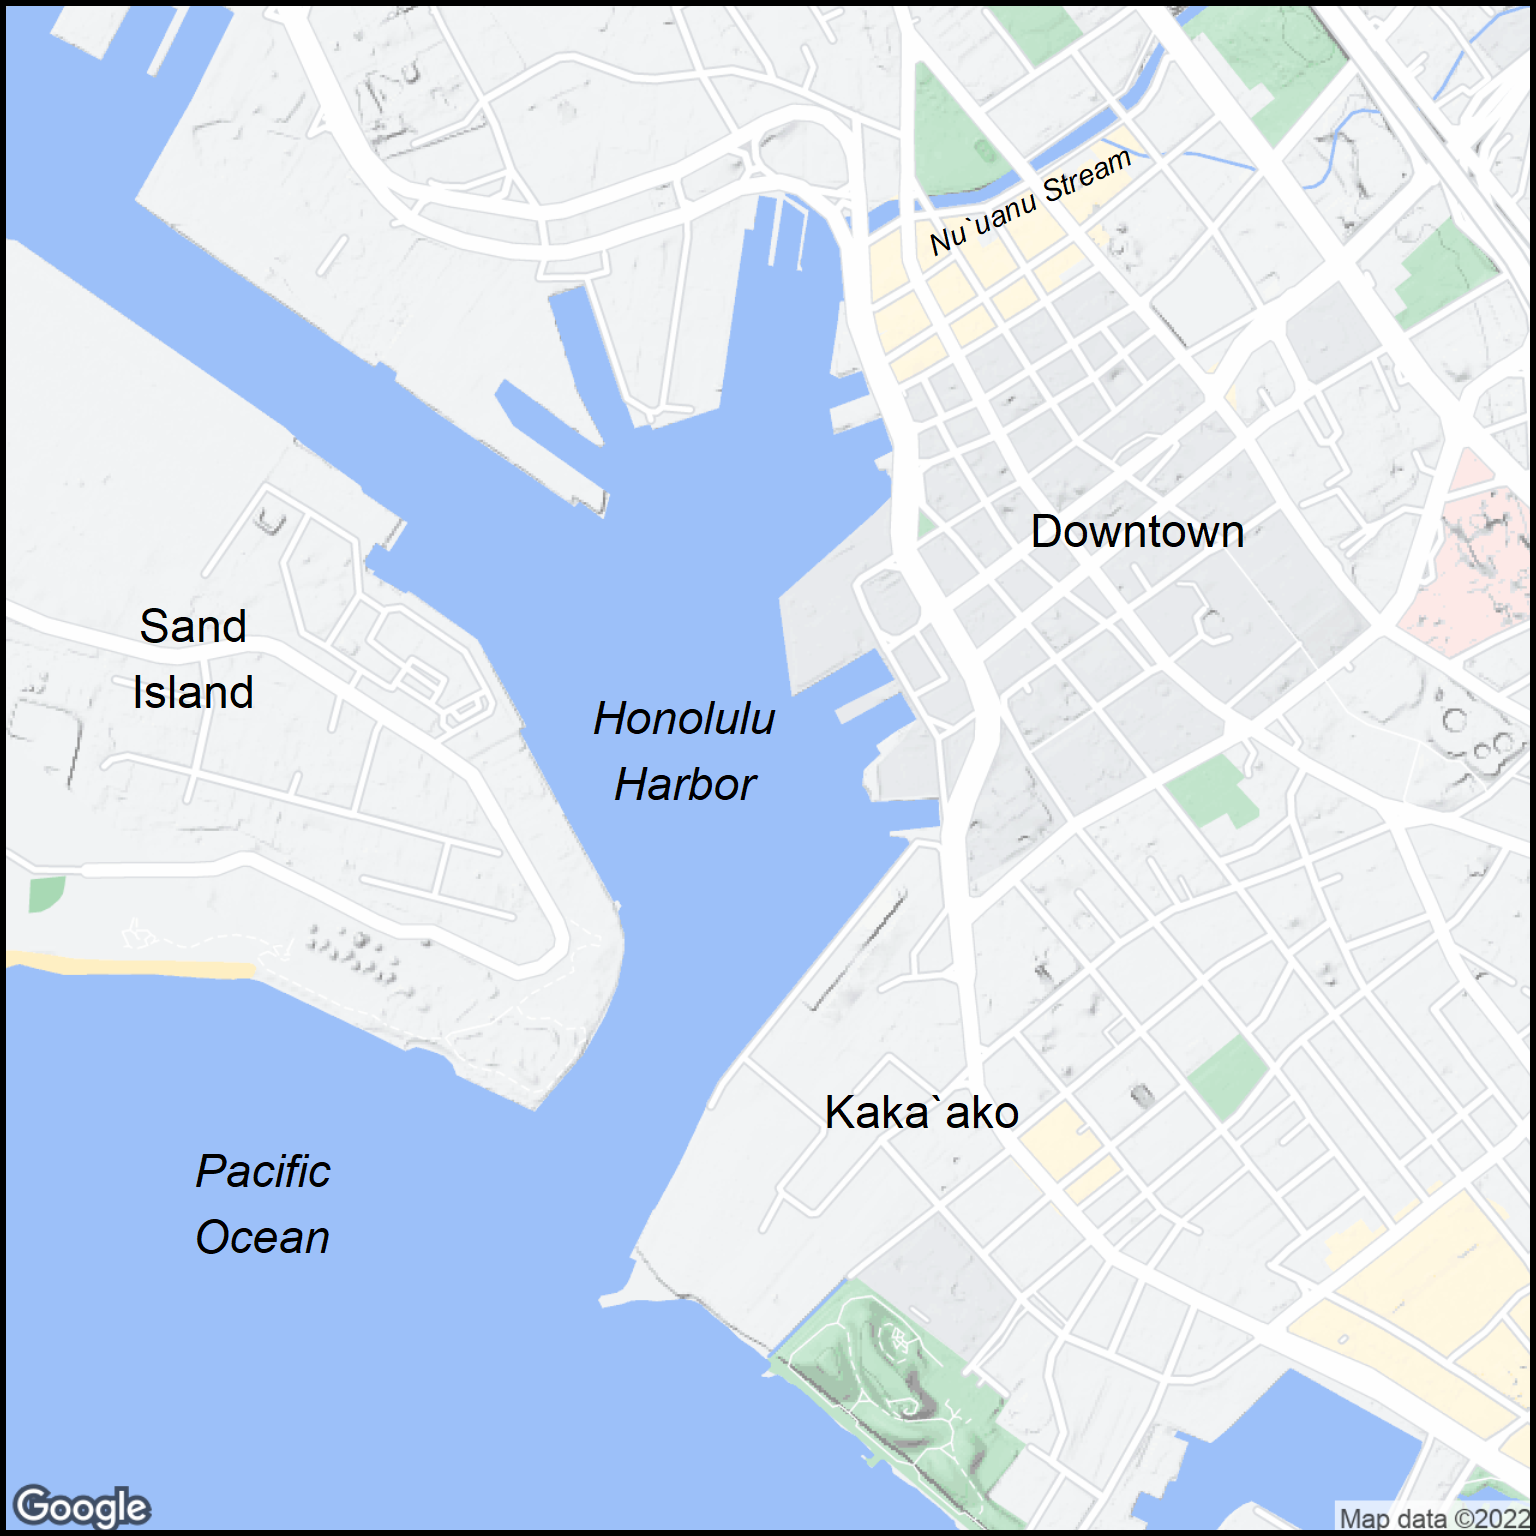
The next step is to create a set of names in a table. The names have characteristics, specified with data in the table columns, that control the location and appearance of the name (see Table 2).
There are other name characteristics. These will be discussed later. This set is enough to show the basic requirements for adding names to basemaps.
Table 2: The names table for the basemap of Downtown Honolulu.
text
lat
lon
fontface
name_text_size
angle
name_text_wrap
Honolulu Harbor
21.30469
−157.86819
italic
6
0
9
Sand Island
21.30622
−157.87696
plain
6
0
9
Downtown
21.30836
−157.86007
plain
6
0
NA
Kaka`ako
21.29868
−157.86393
plain
6
0
NA
Pacific Ocean
21.29714
−157.87574
italic
6
0
9
Nu`uanu Stream
21.31385
−157.86202
italic
4
25
NA
Finally, we can apply the names to the basemap.
Note that some of the names, like “Pacific Ocean,” are too long to fit into the appropriate space. The site_textwraps function comes to the rescue. Each name can be adjusted into multiple lines, with the wrap parameter controlling the maximum text length. The text is broken between words. The NA designation means that the text should not be broken.
You can see many of the style features on the Honolulu Harbor basemap.
Conventions for Name Styles
Cartographers have some style conventions that apply to the way place names appear on maps. Here are a few of those that are used most widely (expressed in terms of the parameter values that are available).
Oceans, lakes and rivers use italicfontface. Locations on land use the plainfontface.
River names are at an angle so the name runs parallel to the river course.
Names are never upside down.
Names for places on land should be placed on land. The names for coastal locations (e.g., a harbor or seaside community) should be placed over water.
Area names should be in the center of the region. Nearby names should not be lined up (e.g., on the same horizontal line).
There should be a clear association of the names with the features.
Readability is important.
Using Names
It’s important to remember that the file for points and label information is separate from the names information file. The two files have a similar structure (e.g., text, lat, lon plus style columns).
Applying the names is best imagined as a layering process. The basemap comes first, then points and labels are layered on top. Finally, the name layer is added.